Easy Checkout Widget
Overview
This is the recommended method for integrating a payment method selection section into your checkout page form when exclusively using Optty payment methods. This approach ensures that all configuration on the UPP, including checkout widgets and customer fees, are fully utilised on your checkout page.
Step 1 - Widget Setup & Initialisation
Overview of Widget Setup and Integration
1.1 Initiate Widget
<script>
  (function (w, d, s, o, f, js, fjs) {
    w['JS-Widget'] = o;
    w[o] = w[o] || function () { (w[o].q = w[o].q || []).push(arguments) };
    js = d.createElement(s), fjs = d.getElementsByTagName(s)[0];
    js.id = o; js.src = f; js.async = 1; fjs.parentNode.insertBefore(js, fjs);
  }(window, document, 'script', 'mw', 'https://widgets.qa.optty.com/widget-loader.js'));
</script>1.2 Load configuration
<script>
    // … widget initiation script …
    mw('init', {
        token: {{CUSTOMER_WIDGET_TOKEN}},
        currency: "string",
        initialAmount: number
        mode: “live”
    });
</script>1.3 Setup Optty Easy Checkout Widget
<script>
    mw('optty-easy-checkout-widget', {
        initialAmount: number,
    })
</script>Step 2 - Add Payment Provider Selection
Add this div where you want the payment provider options to appear, it will show an accordion of the available payment options for the relevant currency.
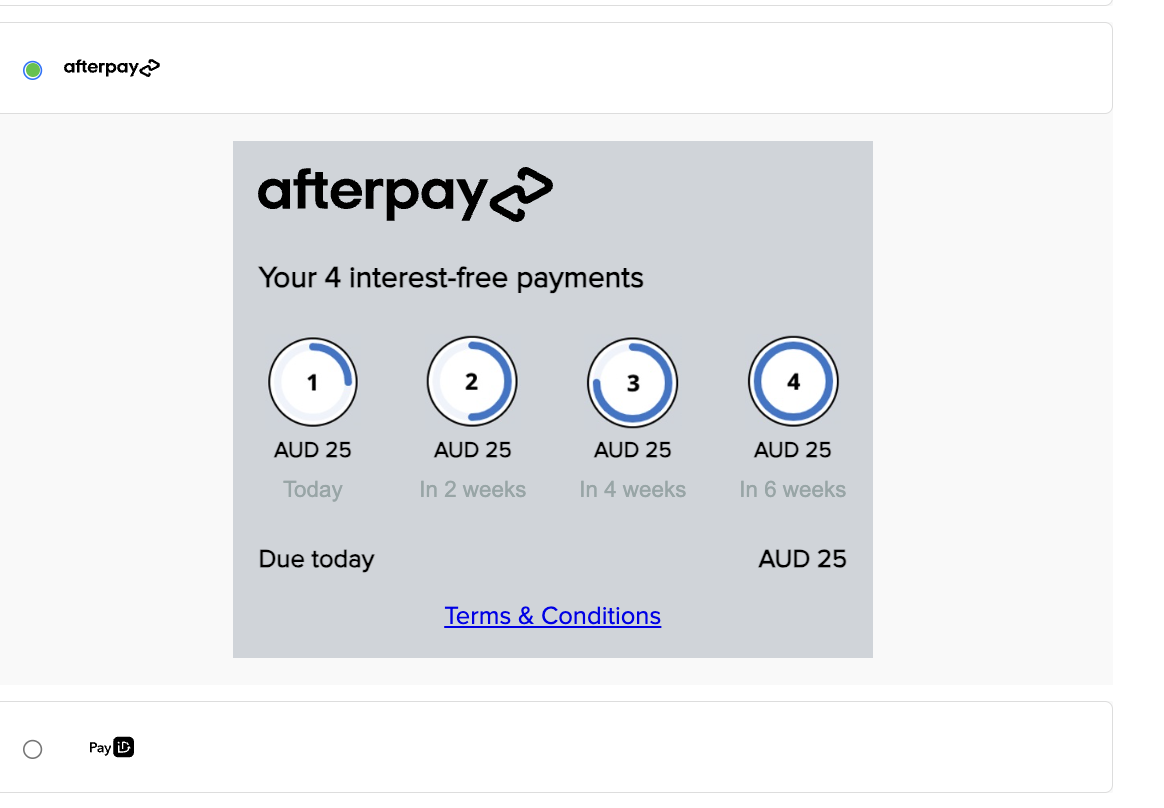
<div class="optty-easy-checkout-widget"></div>When a payment method is selected, there is a drop down with call to action information about the provider, in the example you can see the AfterPay default content. Explain how the buy now pay later works to the customer before they proceed to checkout.

When a customer selects a payment method there is abnplSelected message sent, this will contain which provider the customer has selected and you must pass it through to either of the following methods to handle creating an order, Create Order Widget, API Driven Create Order Widget or Direct API Orders
Step 3 - Call to Action (CTA) Configuration
The area highlighted in red can be configured from the UPP under the "Checkout Widget" tab when managing a payment method.

You can customize this CTA using the configuration below. Entering an IFrame URL enables the use of the %iframe tag in the Text and Layout section to display an iframe as your CTA.

Step 4 - Handling Surcharges (Optional)
Surcharge functionality can be enabled from the UPP, for details on how this surcharge amount is calculate and configured read more here Surcharge Feature. This surcharge is automatically applied to all orders created through any means.
A consumer must be made aware of the surcharge amount and consent to paying it. The easy-checkout-widget handles this.

To ensure that the customer has consented to this surcharge before placing the order, you should add place_order id onto the button that initiates the payment by the customer. This will set the disabled flag on the button if the customer has selected a payment provider with a surcharge and has not checked the consent tick box or does not have any payment provider selected.
Last updated